Python MaterialX
MaterialX release distributions include Python sub-modules for editing documents, code generation, and rendering. The sub-modules are wrappers for C++ libraries also shipped with releases.
For content on this site the minimum requirement is MaterialX version 1.38.7 is and Python 3.9.
A Visual Studio Code environment has been chosen to provide tutorials and
utilities written in Python. Published content can be directly
accessed in ![]() .
.
The following videos and corresponding text instructions can be followed to set up an appropriate environment.
Using MaterialX version 1.38.8 or laterAs of version 1.38.8, MaterialX Python package can be downloaded and install from PyPi.
|
Using MaterialX versions prior to 1.38.8For users who wish to use earlier versions they can:
|
Prerequisites
The basic requirements are:
- Installation of a version of Python that matches the Python version of the MaterialX package.
- Installation of pip
- Installation of the VSCode Python extension with the interpreter referencing the installed version.
- Setup of a virtual environment following the instructions found here. Basically:
-
⌘/Ctrl+Shift+Pcan be used to run the commandPython: Create Environment. - Choose to create a
virtual environment>(versus aCondaenvironment). - Choose the Python interpreter that matching the MaterialX Python version.
-
- Installation of the Jupyter extension for VScode if using the Notebook tutorials.
Installing MaterialX Python
We will use a simple example file called hello_materialx.py. Add this file to your workspace and attempt to run it.
This will result in an import error if MaterialX is not installed yet.
import MaterialX as mx
ModuleNotFoundError: No module named 'MaterialX'
To install the MaterialX package into the virtual environment a
VSCode workspace terminal (1) can be opened and
pip used to install from
- The MaterialX package location using:
python -m pip install . -
the PyPi distribution using:
pip install MaterialX
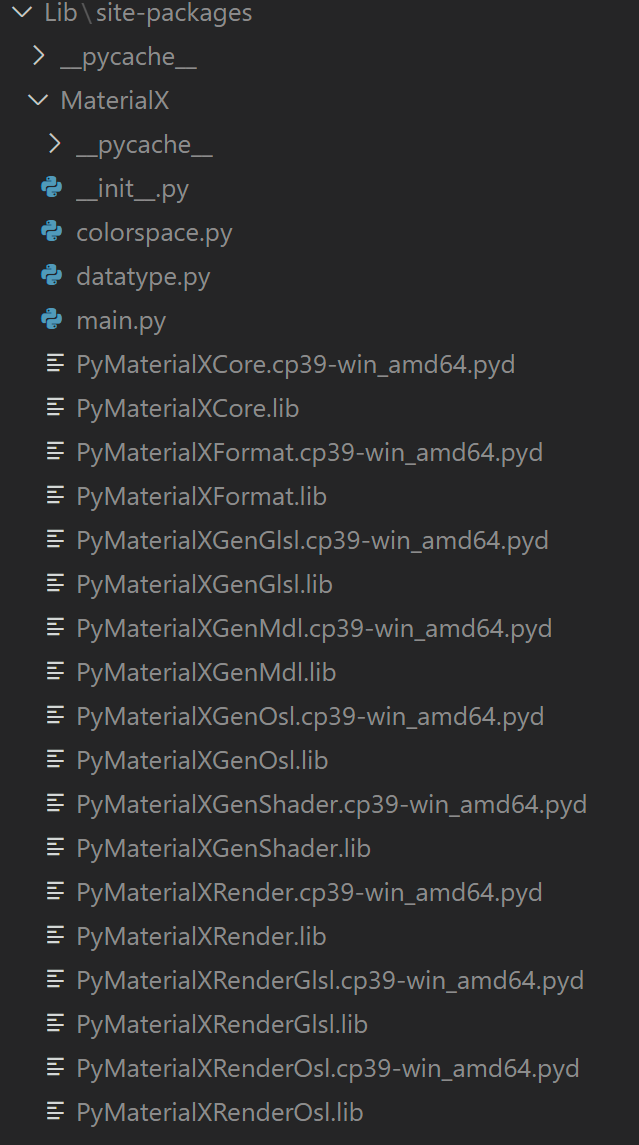
This will add the MaterialX modules to the virtual environment under
.venv/Lib/site-packages.
The modules installed will depend on the ones found in the package location.
Other dependent packages can be added using pip or other means
as necessary.
(1) A security alert may show up when running from the terminal. If so, follow the the instructions provided to to set up appropriate permissions
Import Example
Importing MaterialX will include all sub-modules. This differs from
C++ where individual sub-modules can be loaded.
Shown below is how to import MaterialX with the module name mx.
import MaterialX as mxAt a minimum a document must be created as all operations are based on documents.
To test that the environment works properly the test example creates a document and checks the version of MaterialX.
doc = mx.createDocument()
print('Hello MaterialX (Version %s)' % doc.getVersionString())
Minimal "Useful" Example
To do any useful operations, the standard MaterialX libraries need to be loaded. The load_libraries.py example shows this minimal setup.
import MaterialX as mx

# Create library document and load in default data libraries
stdlib = mx.createDocument()
libFiles = mx.loadLibraries(mx.getDefaultDataLibraryFolders(), mx.getDefaultDataSearchPath(), stdlib)

# Create main document and import the library document
doc = mx.createDocument()
doc.importLibrary(stdlib)

print('Loaded library file: %d' % len(libFiles))
Note that the "standard" libraries are in the
libraries folder in
the Python package location. The key interfaces used are:
- the
loadLibrariesto load in the standard library definitions. - the Document
importLibraryto import the libraries into a working / main document.
From here, the learning notebooks can be used to discover how to do something useful with MaterialX.
Learning Notebooks
A series of Jupyter learning notebooks are regularly being added and updated. User can clone or copy the repo to run locally, or as of MaterialX 1.38.8, remotely using `Github Codespaces` or `Google Colab`.
See the Hosting page for more details.
Any contribution requests or comments can be posted as pull requests on
![]() .
.
It is recommended to use the MaterialX packages which are available via PyPi which are available starting with version 1.38.8.
For those which may not have access to the execution environment or simply wish to read the notebook pre-evaluated, the results of executing the notebooks are provided in the Examples page. These pages are generated directly from the sample notebooks.
Available Notebooks
A Python file (with markdown), a notebook and a link to content on Github
is given below.
Note that it is possible to start with the Python
itself and convert to a notebook in VSCode or export from a notebook
to Python.
| Description | Notebook |
|---|
Basics
|
|
NodeGraph Basics
|
|
NodeGraph Traversal
|
|
NodeGraph Connectivity
|
|
Library Comparison
|
|
Node Libraries
|
|
Creating Definitions
|
|
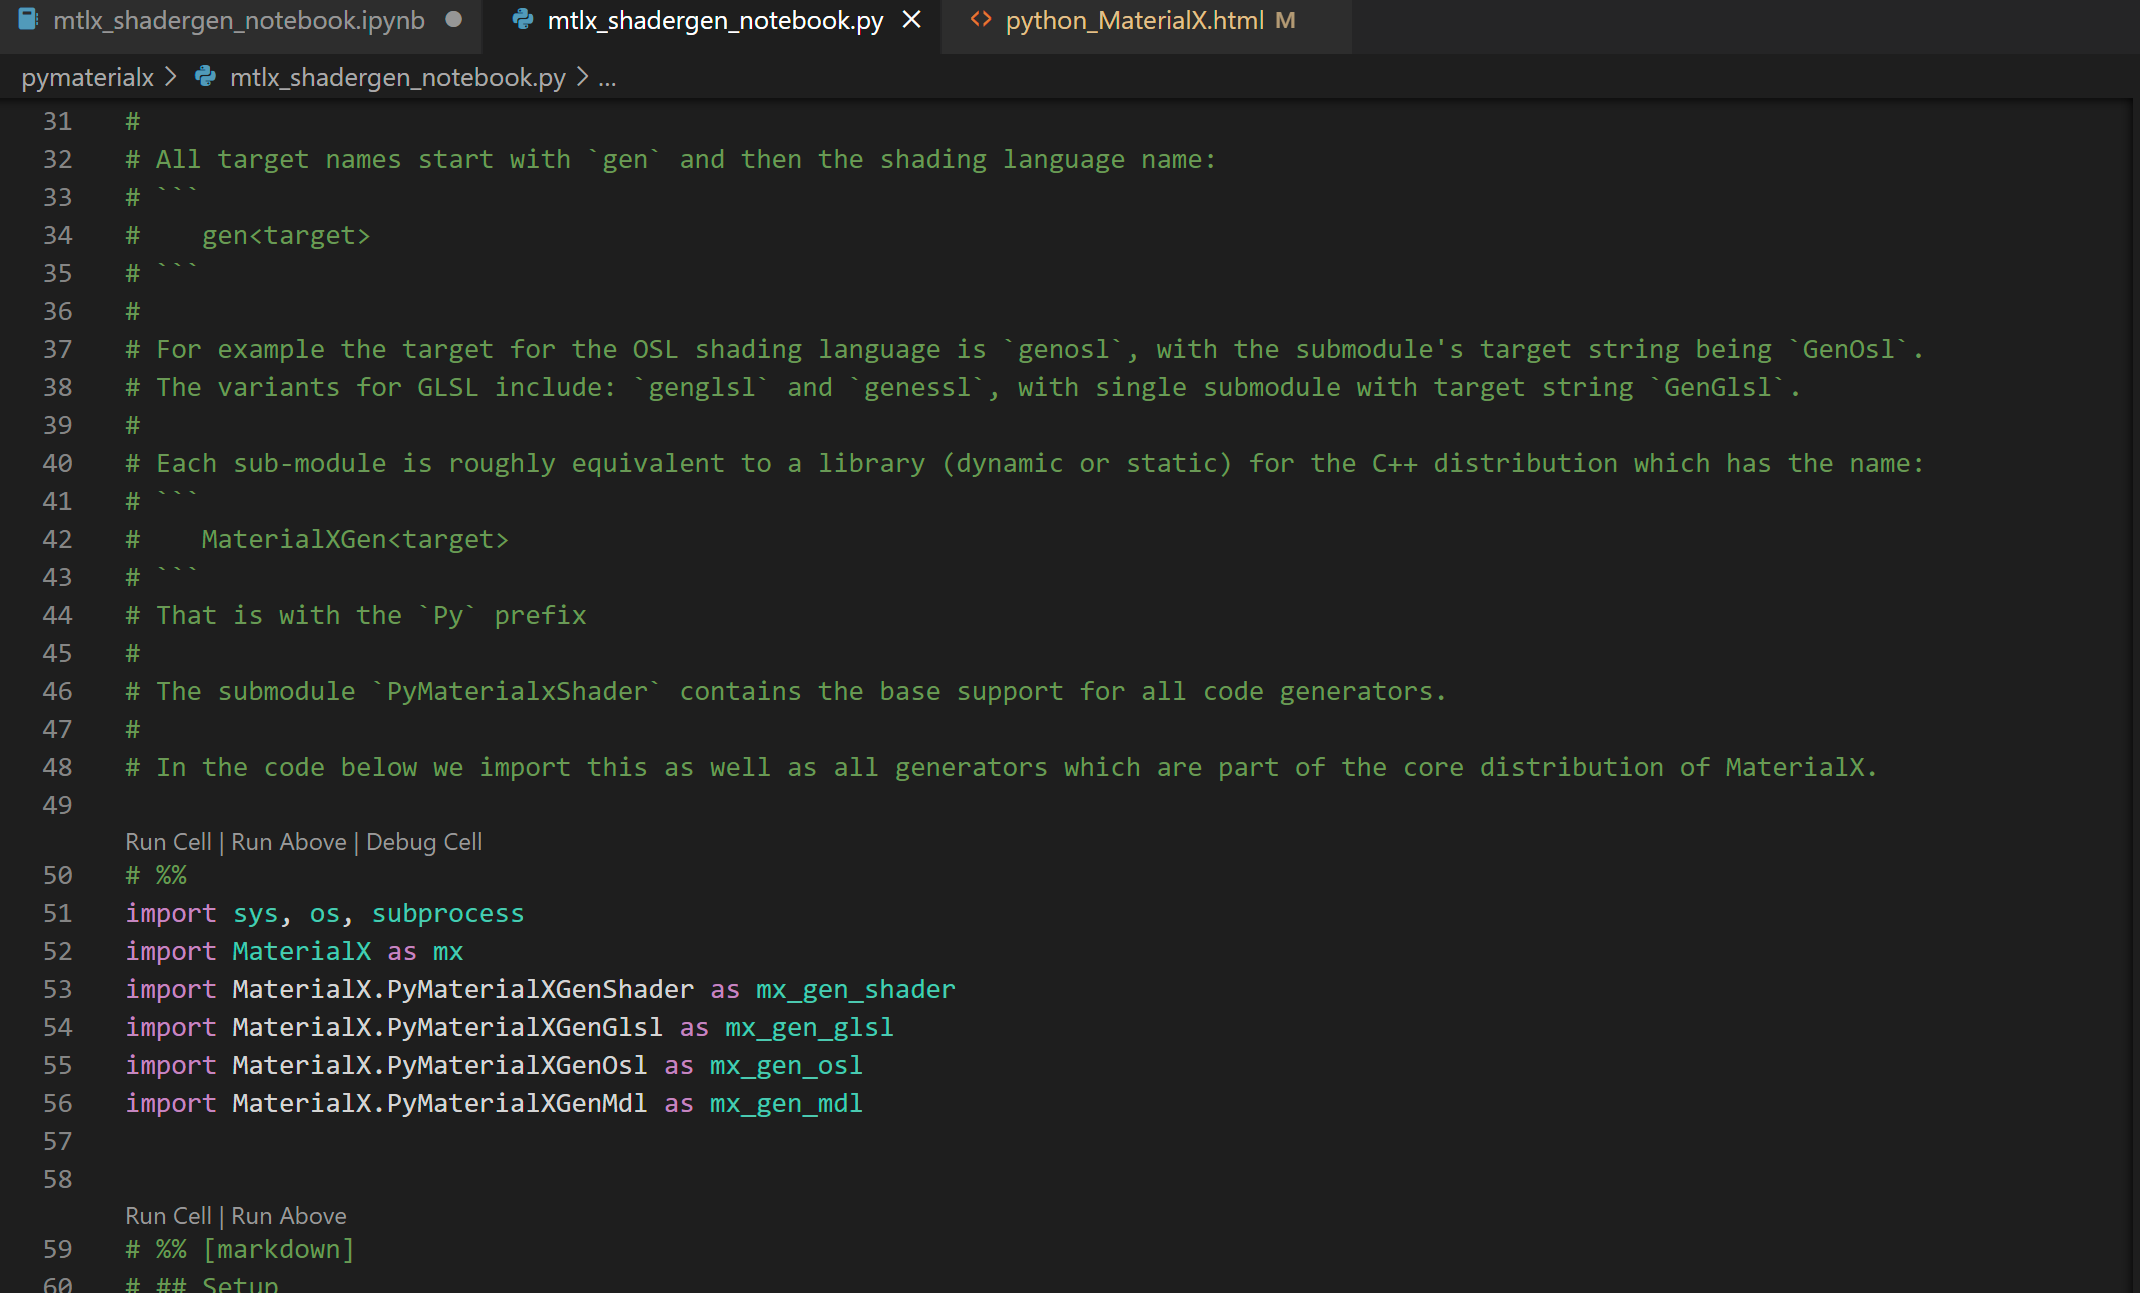
ShaderGen
|
|
Rendering
|
|
Targets and Implementations
|
|
JSON / MaterialX
|
|
USD and MaterialX Graphs
|
|
Blender and MaterialX Graphs
|
|
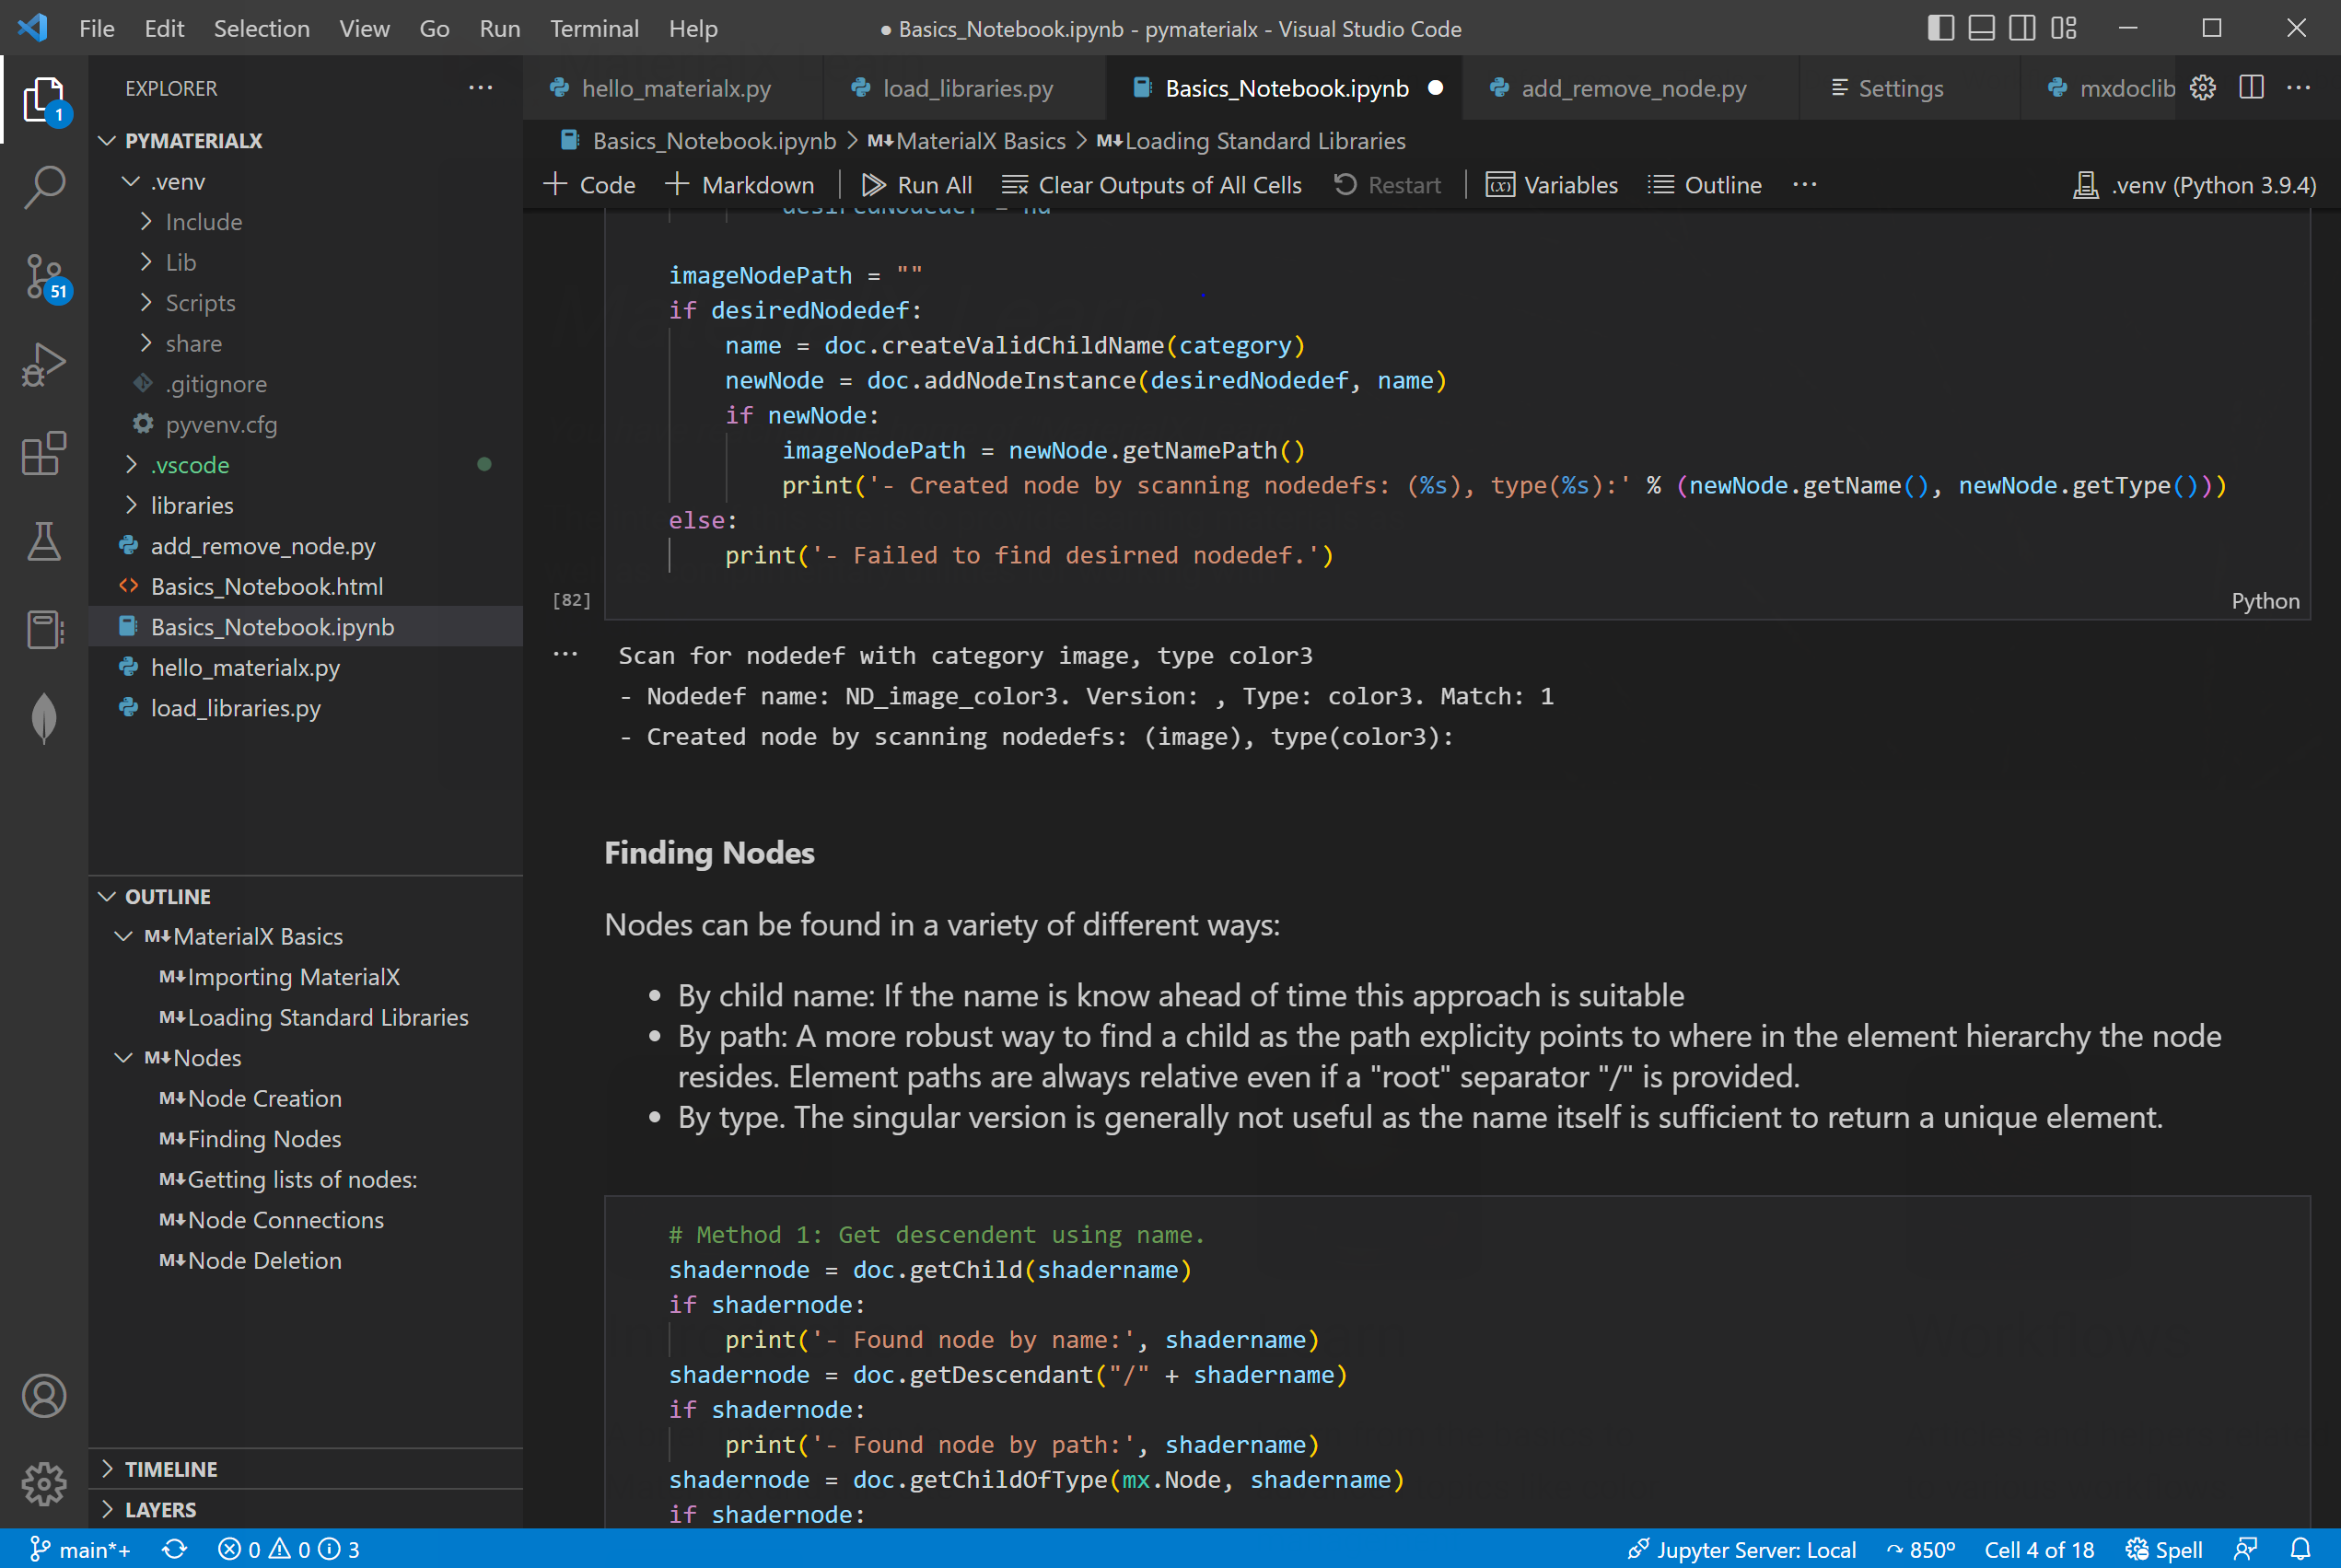
The notebook files can be read in to Visual Studio Code to run or modify as desired.
Below is an example of the "Basics" notebook after execution inside of VSCode.
Below is a snapshot of Python and Markdown with meta data tags within a Python generated from a notebook.